First a note about purchasing games from GamersGate. While both Mac and Windows games are available at GamersGate, if you buy Windows games then when you download it assumes you are using Windows and requires you run an exe to control the download. Fortunately I have Windows XP installed in a Parallels virtual machine and so I was able to run the exe from there. The download was roughly 9 GB (give or take) and so it took a while. In the end I had a DnD_Anthology folder with 12 cab files and a single .msi installer.
Baldur's Gate + Tales of the Sword Coast expansion
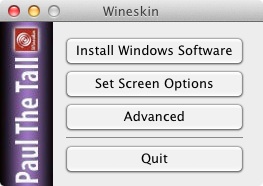 |
| Wineskin.app initial menu |
- Right click on Baldur's Gate.app and "Show Package Contents"
- Double-click Wineskin.app to launch it.
- Click the Install Windows Software button.
- Navigate to the DnD_Anthology folder and select the Classic.msi installer.
- The installer begins and allows the selection of which of the 6 applications to install. I selected Baldur's Gate and deselected the others and the install began.
- When the install completes you are prompted by Wineskin to choose the exe that should execute when Baldur's Gate.app is launched. I chose Baldur.exe. (This setting can be changed at anytime by going to Advanced > Configuration in Wineskin.app.)
- To allow multi-player games to be initiated (a benefit in BG because it allows you to create more than just one party member) I went to the Advanced > Tools screen in Wineskin.app and selected the utility Winetricks.
- Click on Winetricks to launch the Winetricks utility. This utility is often used to install missing missing dll's and other Windows resources that are required by the application.
- On the Winetricks dialog check the Custom checkbox halfway down the dialog box and type directplay in the box to the right of "winetricks" and then click the Run button.
- Winetricks will then download and install directplay. When it completes you can click on the Close button to return to the Wineskin > Advanced dialog. Then click the Done button to return to the Wineskin.app initial menu.
- There can be a white screen delay when launching the game. To prevent this go into Wineskin.app's Set Screen Options and selecting Override and Full Screen and then click Done.
- On the Wineskin.app initial menu click Quit.
 |
| Advanced > Tools dialog |
 |
| Wineskin.app winetricks dialog |
That's it. Afterwards launching Baldur's Gate.app will start Baldur's Gate. You can copy save game files and character files from any other BG installation you have by just copying them into the appropriate folders in the Baldur's Gate.app application. If you want to try installing mods then you should use the Install Windows Software option in Wineskin.app. I strongly recommend making a backup of your Baldur's Gate.app before playing around with it though or you may find yourself having to install it all over again.
The only problem I have had so far is that quitting the game sometimes causes the application to lock up. In that case just cmd-q to exit the Baldur's Gate.app. I have not tested playing multi-player on a LAN.
Baldur's Gate II + Throne of Bhaal expansion
I used Paul the Talls's Baldur's Gate 2 Complete Wineskin wrapper to begin with. For the most part the steps are identical to the ones for installing BG.
- Right click on Baldur's Gate 2.app and "Show Package Contents"
- Double-click Wineskin.app to launch it.
- Click the Install Windows Software button.
- Navigate to the DnD_Anthology folder and select the Classic.msi installer.
- Select BG2 and deselect the other applications.
- When the install completes choose balder.exe when prompted by Wineskin.app.
- Use winetricks to install directplay. (steps 7-10 above)
- Use Set Screen Options and select Override and Full Screen to prevent the white screen delay when launching the game.
- On the Wineskin.app initial menu click Quit.
For some reason every time I launched the game it would say that it was the first time and force me into the BGConfig program. So to get around this I changed the Windows EXE specified in Wineskin.app > Advanced > Configuration from /Program Files/Atari/DnDMC/Baldur's Gate II/baldur.exe to /Program Files/Atari/DnDMC/Baldur's Gate II/BGMain.exe
Quitting and/or logging out of a game can cause it to lock up the application. If that happens just cmd-q to exit Baldur's Gate 2.app. I have not tested playing multi-player on a LAN.
Icewind Dale + Heart of Winter expansion + Trials of the Luremaster
I used Paul the Tall's Icewind Dale Complete Wineskin wrapper to begin with. The steps are similar to those for Baldur's Gate II above.
- Right click on Icewind Dale.app and "Show Package Contents"
- Double-click Wineskin.app to launch it.
- Click the Install Windows Software button.
- Navigate to the DnD_Anthology folder and select the Classic.msi installer.
- Select Icewind Dale and Trials of the Luremaster and deselect the other applications.
- When the install completes choose Config.exe when prompted by Wineskin.app.
- Use winetricks to install directplay.
- Use Set Screen Options and select Override and Full Screen to prevent the white screen delay when launching the game.
- On the Wineskin.app initial menu click Quit.
- Launch Icewind Dale.app and set the configuration as you wish.
- Right click on Icewind Dale.app and "Show Package Contents"
- Double-click Wineskin.app to launch it.
- Click the Advanced button.
- In the Windows EXE box change the program to IDMain.exe and click Done.
- On the Wineskin.app initial menu click Quit.
 |
| Wineskin.app Advanced dialog |
Quitting a game can cause it to lock up the application. If that happens just cmd-q to exit Icewind Dale.app. I have not tested playing multi-player on a LAN.
Icewind Dale II
I used Paul the Tall's Icewind Dale 2 Wineskin wrapper to begin with. The steps are essentially the same as the steps for Icewind Dale.
- Right click on Icewind Dale 2.app and "Show Package Contents"
- Double-click Wineskin.app to launch it.
- Click the Install Windows Software button.
- Navigate to the DnD_Anthology folder and select the Classic.msi installer.
- Select Icewind Dale 2 and deselect the other applications.
- When the install completes choose Config.exe when prompted by Wineskin.app.
- Use winetricks to install directplay.
- Use Set Screen Options and select Override and Full Screen to prevent the white screen delay when launching the game.
- On the Wineskin.app initial menu click Quit.
- Launch Icewind Dale 2.app and set the configuration as you wish.
- Right click on Icewind Dale 2.app and "Show Package Contents"
- Double-click Wineskin.app to launch it.
- Click the Advanced button.
- In the Windows EXE box change the program to IWD2.exe and click Done.
Quitting a game can cause it to lock up the application. If that happens just cmd-q to exit Icewind Dale 2.app. I have not tested playing multi-player on a LAN.
I have noticed some cursor flickering which can be annoying. I'm not sure how to resolve that.
Temple of Elemental Evil
For ToEE I could not find an existing free Wineskin wrapper to use, so I created my own. To do so I used the following free tools:
- Wineskin Winery 1.3 to create the Wineskin wrapper
- Img2icns to create an icon for the finished application
Within Wineskin Winery you specify an Engine and wrapper version to use and then create a new blank wrapper. Engines and wrappers are downloaded for you within the utility. Once you start Wineskin Winery, to get the latest Wrapper version just click on the Update button. Following that click on the + button to download an Engine. For ToEE I used the WS8WineCX10.1.0 Engine. I tried a few others first and they did not display the opening screens correctly.
When you create a new wrapper you will be prompted to allow X11 to communicate with your system, to which you should click Accept. You will also get a dialog asking you if you want to install Gecko. Gecko isn't needed for most games, so do not install it. When prompted to name your wrapper you should use the name you want the .app to be. In this case I chose Temple of Elemental Evil.
Once you have your Wineskin wrapper created you can quit Wineskin Winery.
Once you have your wrapper the steps are very few. Use Wineskin.app's Installed Windows Software to install ToEE from the Classic.msi installer; for the Windows EXE select ToEE.exe. You do not have to change the Screen Options or install directplay for ToEE.
To create the icon for the application I just Googled for a good image and then dragged it onto the Img2icns window and saved the results as icns. You can then browse in Finder to that created icon file and do Get Info on it. In the Get Info dialog click on the icon in the upper left and type command-c to copy it. Then do Get Info on your Temple of Elemental Evil.app and click on the Wineskin icon in the upper left corner and type command-v to replace that icon with the one you created. That's it.
Those familiar with ToEE know that there is a modding group called the Circle of 8 who released corrections and enhancements to ToEE. While installing those was tempting I could not find a way to do so from within Wineskin.app because they rely on .Net. It might be doable by installing the missing components with winetricks and then using Install Windows Software to install the mods, but I did not figure out the necessary steps to get the custom content installed.
Planescape: Torment
I saved the best for last. Getting PS:T working was in fact a torment. Here is the process I followed, based in part on the installation instructions at this blog.
First I used Wineskin Winery to create a blank wrapper using Wineskin 2.5 and Engine WS8WineCX10.1.0 and named it PlanescapeTorment.app
Second I used the Wineskin.app Install Windows Software option to install PS:T from the Classic.msi installer, and then setting the Windows EXE to Torment.exe
Then in Wineskin.app Screen Options I turned on Override and selected Fullscreen.
Then I used Img2icns.app to create a nice icon from the icon here and pasted it onto the PlanescapeTorment.app icon in the Get Info dialog.
At this point I tested the game and it worked, but the resolution was so low that everything was huge. So I continued on installing the two mods suggested on the blog to address that. Before you do I strongly recommend you make a copy of your PlanescapeTorment.app. It is possible that any further mods will result in messing up your .app file and you would then have to start over.
I downloaded and installed The Bigg's Widescreen mod:
Dungeon Master and Chaos Strikes Back
 |
| Wineskin Winery utility by doh123 |
Once you have your Wineskin wrapper created you can quit Wineskin Winery.
Once you have your wrapper the steps are very few. Use Wineskin.app's Installed Windows Software to install ToEE from the Classic.msi installer; for the Windows EXE select ToEE.exe. You do not have to change the Screen Options or install directplay for ToEE.
To create the icon for the application I just Googled for a good image and then dragged it onto the Img2icns window and saved the results as icns. You can then browse in Finder to that created icon file and do Get Info on it. In the Get Info dialog click on the icon in the upper left and type command-c to copy it. Then do Get Info on your Temple of Elemental Evil.app and click on the Wineskin icon in the upper left corner and type command-v to replace that icon with the one you created. That's it.
Those familiar with ToEE know that there is a modding group called the Circle of 8 who released corrections and enhancements to ToEE. While installing those was tempting I could not find a way to do so from within Wineskin.app because they rely on .Net. It might be doable by installing the missing components with winetricks and then using Install Windows Software to install the mods, but I did not figure out the necessary steps to get the custom content installed.
Planescape: Torment
I saved the best for last. Getting PS:T working was in fact a torment. Here is the process I followed, based in part on the installation instructions at this blog.
First I used Wineskin Winery to create a blank wrapper using Wineskin 2.5 and Engine WS8WineCX10.1.0 and named it PlanescapeTorment.app
Second I used the Wineskin.app Install Windows Software option to install PS:T from the Classic.msi installer, and then setting the Windows EXE to Torment.exe
Then in Wineskin.app Screen Options I turned on Override and selected Fullscreen.
Then I used Img2icns.app to create a nice icon from the icon here and pasted it onto the PlanescapeTorment.app icon in the Get Info dialog.
At this point I tested the game and it worked, but the resolution was so low that everything was huge. So I continued on installing the two mods suggested on the blog to address that. Before you do I strongly recommend you make a copy of your PlanescapeTorment.app. It is possible that any further mods will result in messing up your .app file and you would then have to start over.
I downloaded and installed The Bigg's Widescreen mod:
- Downloaded widescreen-v3.05.exe from <http://forums.gibberlings3.net/index.php?s=ab759621f20e6e33366f362095575c1e&app=downloads&showfile=896>
- Use Wineskin.app Install Windows Software to run widescreen-v3.05.exe. When it prompts for a directory type in the path to the Planescape Torment folder (for me it was C:\Program Files\Atari\DnDMC\Planescape Torment)
- After a while of spinning press command Q to quit the never ending Wineskin is currently busy dialog.
- Use Wineskin.app Install Windows Software to run setup-widescreen.exe and it should open up a text window and give instructions so you can install the component, choose your screen size (X 1024, Y 768 worked for me), and update your save files. Once it starts updating it will run for a few minutes and then say that it was successful and press enter to exit.
- Wineskin will tell you to select a new executable and if for some reason it does not allow Torment.exe then just accept it and then go into the Advanced configuration and change the Windows EXE back to Torment.exe
- Downloaded Ghostdog's UI mod from <http://www.shsforums.net/files/file/683-ghostdogs-pst-ui-mod-v22/>
- To decompress it you'll need an app that can decompress 7zip files. I use Keka.
- Decompress Ghostdogs_PST_UI_mod_v2.2 and copy the contents to the same directory that Torment.exe is in.
- Use Wineskin.app Install Windows Software to run Setup-GhostDog's-PST-UI.exe
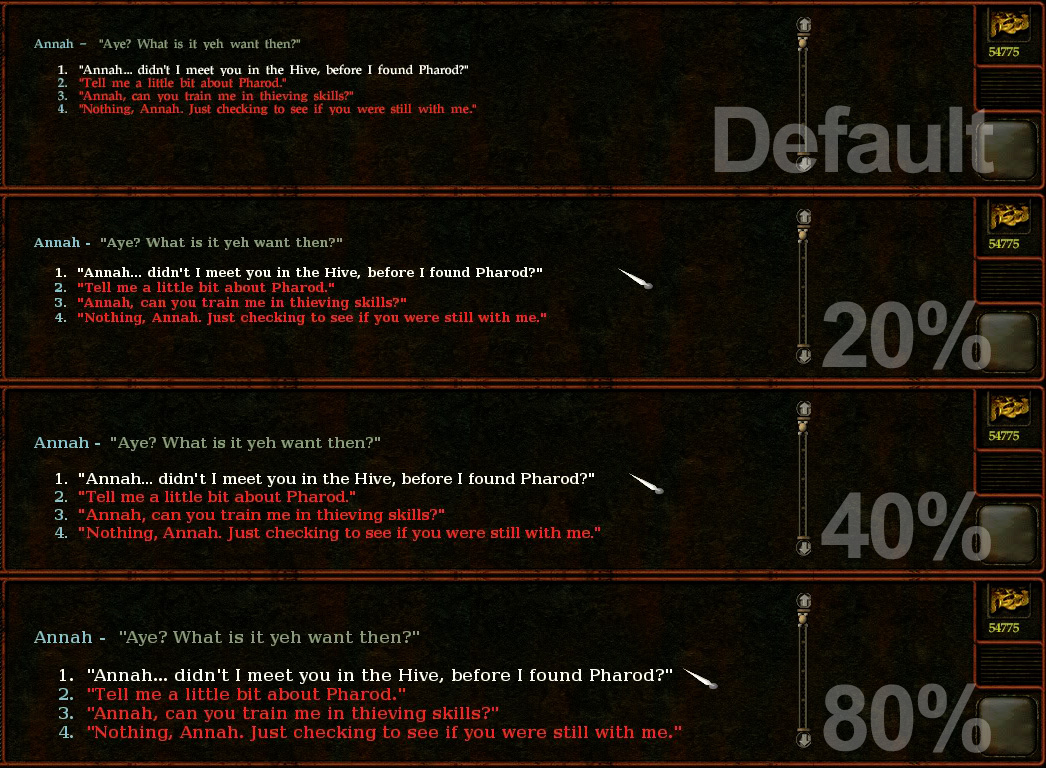
- Install the component and pick the percentage and language you want (use the image at <http://www.thunderpeel2001.com/webpics/font-sizes.jpg> to determine what size is most readable)
- Click OK when Wineskin asks you to select the executable
Following this I started up PS:T and everything was working. At this point I suggest you either stop or you make a backup of your PlanescapeTorment.app file because all further attempts I made to install custom content failed and broke the game. I tried to install the Ultimate PST Fixpack, Unfinished Business, and the Qwinn's Tweak Packs. Those mods are supposed to be installed in that order. However I found that after installing the Ultimate PST Fixpack any attempt to start the game would just crash. So my advice is to just stop after installing the widescreen and Ghostdog UI mods.
Dungeon Master and Chaos Strikes Back
I whipped out functional wrappers for Dungeon Master and Chaos Strikes Back in no time at all, but suffered a set back when trying to create a wrapper for Dungeon Master II. Since those games do not have installers I just created new blank wrappers and then dragged their game folders into the Program Files folder in the wrapper and set the Windows EXE appropriately.
I think that Wineskin opens up a whole new world of gaming for Mac users, as well as helping us play games like Baldur's Gate whose Mac client will not work on OS X 10.7 or later.
I think that Wineskin opens up a whole new world of gaming for Mac users, as well as helping us play games like Baldur's Gate whose Mac client will not work on OS X 10.7 or later.


