For April Fools Day this year Google released an update to Google Maps that displays the maps in "8-bit" mode, reminiscent of classic cRPG's from the 1980's like Ultima.
View Larger Map
Those Google engineers can be so clever at times.
Update: Well, it worked for a while but they turned it off. So this post makes little sense now. I guess I should have posted a a screen shot.
Tuesday, April 3, 2012
Changing Menu Options in Wineskin
This is a repost of the directions from doh123 on how to change the menu options in Wineskin. This allows you to easily add to the menu the ability to launch other programs that are installed in the wrapper (such as configuration utilities) or to open websites. The original post in the Wineskin forum is here.
This take a bit of scripting knowledge, or programming if you want to completely replace them.
If you look inside the wrapper at Contents/Resources there is a folder called WineskinMenuScripts
You can name them in the same pattern you see the default ones there... make new ones, or change ones there. For this, I'll just assume you edit the one called "AppEntry1--Wineskin Website" which is what shows up under the main App drop down menu.
Change the name of it to "AppEntry1--Launch Editor" (or whatever you want to name it, the text after the double dash is what is listed in the menu).
Then right click the file and Open With Textedit.app
Don't touch the first 5 lines, just leave them as is. Delete the line that says... open "http://wineskin.doh123.com/"
Only 1 line is needed to launch what you want (and its Wineskin, not wineskin, or it won't work)
Wineskin "$WINEPREFIX/drive_c/Program Files/MyProgramFolder/MyProgram.exe"
after that line, just save and close it... and when you select that menu item next time you run it, it should run the exe. You do have to do the full path and exe file in quotes just like that after using the Wineskin command, so just change the "/MyProgramFolder/MyProgram.exe" or whatever you need so that its actually your exe file.
Saturday, March 24, 2012
SWTOR Reflections after one month in

Star Wars The Old Republic (SWTOR) has been consuming much of my free time for the last month, allowing me to level up two characters to level 20 and one to level 10. So here are some tips I've learned as well as my general thoughts on the game so far.
[Update: As of July 2013 I now have 18 characters spread across 3 servers. My highest level character currently is level 43.]

First the interface of the game assumes quite a bit of knowledge in order to function properly. My guess is that that knowledge comes naturally to players of other online games like World of Warcraft, but may play a long time without knowing about helpful things that should be obvious. Here are a few examples:
Managing Your Companion
Regardless of what class you select for your character you will eventually be assigned a companion who will follow you around and assist you, generally around level 8 or so. They also irritatingly get in your way especially if you are using skills like Archaeology and Slicing which require clicking on things you find in the world frequently. [Update: There is a preference setting that allows you to turn off companions using the gathering skills.] The interface allows you to do a number of things with your companion but they aren't obvious.
Dismissing your companion: You can dismiss your companion at any time. Based on what I have seen if you fight alone you will gain more xp than fighting with your companion's aid, so this is one valid reason to dismiss your companion. Another reason to dismiss is if your companion has died in battle, especially if you ran away from the area in which he/she died. Companions can be summoned at any time except in battle, so there is no risk to dismissing your companion. To dismiss a companion right click on their portrait in the lower left corner of the screen and select the dismiss option from the pop up menu. I have found that some of the main plot scenes expect your companion to be present and if he/she is not you may encounter a bug. So before going into a major plot area you may want to summon your companion. [Update: Often you will be told that you cannot start a conversation without a specific companion present, in which case you must summon the companion and then re-initiate the conversation.]
Summoning or switching your companion: If you have dismissed a companion and want to summon the companion back just click on the little button attached to the lower left edge of the empty companion portrait in the lower left corner of the screen. When you summon a companion he/she will be at full health, so if your companion has died or been seriously damaged it may be faster to dismiss and summon than to heal him/her. If you have multiple companions and want to summon a different one you can open the crafting window that allows companion summoning by either pressing N or clicking on the button in the upper right edge on the companion portrait in the lower left corner of the screen,
Resurrecting your companion: If your companion has died in battle and you want to resurrect him/her just right click on his/her body. If you are not able to get to where the body is then just dismiss the companion and summon him/her again and he/she will be teleported to where you are. You don't need to have the icons for revive companion in your quickslot bar.
Clothing/Equipping your companion and/or changing their appearance: This has been my experience with the non-human companions assigned to the Jedi Consular, Jedi Knight, and Sith Inquisitor, but I suspect it applies to all companions. Companions can be given clothing you find or purchase (tip: even clothing that is "bound" to you can be given to a companion) to improve their stats by opening the character window (press "C") and clicking on the companion tab and then dragging items from your inventory the same way you would for your main character, but depending on their appearance they may not display the clothing you give them. To give them a different appearance you have to buy the alternate appearance sets from the companion vendors and drag it in their special appearance slot on the companion tab of the character window. The sets are expensive but you can get a preview of what your companion will look like without purchasing them by ctrl left-clicking on the set. While the alternate appearance sets are rally the only option for changing the appearance of non-human body type companions like Khem Val, they can also be used with human body type companions to alter their faces. There has been a long-standing bug though that if you have an appearance set and then try to preview an item on your companion the preview window will not appear correctly. To get the preview window to work properly you may have to remove the appearance set. Fortunately there is no cost to temporarily removing an appearance set.
Giving your companion gifts: You can find items that would be suitable gifts for a companion. It will say in the item description that the item is a suitable companion gift and whether the current active companion will appreciate it or not. You can also buy companion gifts from the companion vendors. To give a gift to your companion just right-click on the gift. The point of giving gifts is to improve the affection of your companion for you which can improve crafting skills and advance the companion storyline. If none of your companions appreciate a gift you may want to store it in your cargo hold for a later companion.
Speaking with your companion: Sometimes your companion will have something to say to you. If so then there will be a little talk icon on their portrait. They will not talk to you however unless you are in a cantina or on your ship. Once you get to a suitable talking place right click on the companion (not the companion portrait) to initiate the conversation. Generally what they have to say is either inconsequential or advances their personal storyline.
Sending your companion on missions: Your companion can be sent on missions based on your gathering crew skills. To see what missions are available you press N or click on the little button attached to the upper right edge of the companion portrait. This will open a window with a list of available missions. Missions are divided into difficulty levels. Sending your companion on a mission will make the companion unavailable for some length of time, usually just a few minutes, and cost you some credits. When he/she returns you will be told whether the mission was successful or failed and what you earned from it. Sending your companion on missions seems to be the cheapest way to find rare materials needed for crafting items.
Using your companion to craft items: Once you have a companion and get off the first planet you can learn crew skills from crew skill trainers. Subscribers are restricted to 3 skills: 2 gathering skills and 1 crafting skill. Even though you can eventually have more than one companion, you remain restricted to only 3 total skills. When you start a skill you have no points in that skill. As you use the skill you gain points and that allows you to do better with the skill. When your companion crafts items, which will require specific resources depending on the item being crafted, you gain both the item and increase your crafting skill. Crafting takes time, tying up your companion for a minute or two, but doesn't cost any credits. Subscribers can queue up to 5 actions on up to 3 companions, so if you want you can give them several crafting commands and then forget about them for several minutes. To initiate crafting you can click on the Crew Skills icon or click on the icon in the upper right portion of the companion portrait. Crafted items can be sold in the Galactic Trade Market because they are not bound to your player until you equip them. They can also be emailed to other characters as long as they are on the same server. Also there is a chance that you may craft an "excellent" version of an item, which means that an augment can be installed into it to increase its abilities. You can also use reverse engineering on crafted items, which reduces them back to part, but not all, of their basic components. The advantage of reverse engineering items you have crafted is that there is a chance that you will automatically learn the ability to craft a better version of that item.
Using your companion to sell excess items: If you have a lot of "junk" items in your inventory you cannot use (gray outlined items serve no purpose except to be sold for credits) then you can order your companion to go sell them for you by right clicking on the companion portrait and selecting the sell junk items options from the pop up menu. The companion will leave for a minute to sell them and then return. This can be handy if you are far from a vendor.
Using the Galactic Trading Market to Buy and Sell non-bound items
You will find many things during your adventuring that you cannot use or use for only a while. You can sell these items to vendors but they do not pay well. A much better way to earn credits on items you are not bound to is to offer them for sale in the Galactic Trade Market. To use the Galactic Trade Market you have to go to a Galactic Trade kiosk, which can be found on the main map (press "M"). (There are no kiosks on the starter planets though). At these kiosks you can both purchase and offer items for sale. When you offer items for sale it will default to a reasonable price, which you can then choose to increase or decrease. You also have to put up a percentage of the price yourself to cover your offering. If the item sells or expires you will regain the amount you put up, but if you cancel your offer to sell you lose those credits. This means that you are somewhat limited to how many items you can offer for sale since you have to have the credits to cover them.
If an item sells then you will receive an email with the number of credits attached to it. If the item expires without selling then you will receive an email with your item attached to it and the number of credits you put up. These emails do not seem to automatically expire, so this may be an option for extending your inventory.
Expanding Your Inventory
Unless you sell things frequently you will fill your inventory in no time. There are options to expand your inventory by credits and cartel coins but there are also free options. While you do not gain a ship until around level 15, you can access a cargo hold earlier than that by going to fleet. Travel to fleet becomes available around level 7 but isn't really intended until after you complete the initial starter planet at about level 10. The ship cargo hold is accessible from kiosks at fleet and on most of the planets except the starter planets. Other alternatives are to email your items to another character or post them on the Galactic Trade Market, but due to free-to-play restrictions on email attachments and GTM postings these options are not very useful except to subscribers.
Gaining Crafting Recipes
As you gain in crafting skills you will have access to additional recipes to be used for crafting. However to get these you need to go to the crew skill trainer and purchase them.
Gaining Class Abilities
When you level up you go to your class trainer and pay to gain your class abilities. After you reach level 10 you will have to choose a secondary class. This choice is made by speaking with someone at fleet. After that when you go to your class trainer make sure that you click on the tab for your secondary class to purchase its new abilities as well. Your choice of advanced class will restrict what kind of armor, weaponry, and skills you can use and the choice is not reversible. Only certain classes can wield a double-bladed lightsaber like Darth Maul (specifically Jedi Consular with Shadow advanced class and Sith Inquisitor with Assassin advanced class) or dual-wield lightsabers.
Repairing Your Items
As you fight your armor and weapons get damaged. If left unrepaired they will eventually become unusable. To repair your items and those of your companion go to any vendor or Medical Droid and click on the Repair All button in the bottom left corner of the store window. Better to pay for repairs than to lose your items.
Modifiable Items
The game includes items that can be modified so that they can improve in their stats as you level up your character. Orange items are items which have an orange border around their icon as shown in an inventory screen and these items are always modifiable. Generally these are either armor/clothing or weapons. Unlike most of their non-orange counterparts, orange items can be customized by adding modifications which can be purchased from vendors or the Galactic Trading Market or crafted. Modifiable gear of a type always has the same base stats as other modifiable gear of the same type, they only differ in appearance. So that worn double-bladed lightsaber is equivalent to the fancy orange double-bladed lightsaber you can buy for 14 commendations in everything except the appearance. The point of modifiable gear is that if you like the look of certain armor types and weaponry you can upgrade their modifications as you level up and retain the same look. If you want to see what an item will look like on your character before purchase use ctrl left-click on the item. In some cases it is cheaper to purchase a modifiable item with modifications in it than to purchase the modifications separately. It costs nothing to install a modification into a modifiable item, but unless you want to destroy the modification it replaces you have to first extract the existing modification, which does cost some credits (at a reduced rate for subscribers). Once extracted modifications can be used in other modifiable items or can be reverse engineered to reduce them to some of their basic components.
Originally extracting and installing modifications required using a modification station, but that restriction was removed and modification stations are now mainly extraneous as they are needed only for adding augmentation slots to items. To modify any modifiable item at any time just ctrl right-click on it in your inventory or the character screen (if it is equipped).
While orange items are always modifiable there are items in the game that are other colors such as blue, green, and purple that are also modifiable. So do not assume that just because an item is green it is not modifiable - even though most green and blue items are not.
General Chat
The General Chat feature of the game is quite disturbing. Though there is a profanity filter, there is little point to using it because gamers are experts at getting around filters. The general chat at any place where there are large numbers of players such as the starter planets, capital planets, and fleet is completely filled with sexual and pornographic statements, trolls posting meaningless garbage and spam, noobs asking the same questions over and over (how do I change my lightsaber color, when do I get a speeder, when do I get a ship, when do I get an advanced class, where is my second lightsaber, how do I quit a guild, how do I get unstuck, etc.), non-noobs repeatedly chastising and belittling noobs for doing so, WOW fanbois going on endlessly about pandas, KOTOR fanbois going on endlessly about Revan, PVPers complaining about SWTOR PVP ad infinitum, and Star Wars über-nerds arguing about whose lightsaber is longer ad nauseum. There are two remedies to this, one is to get away from these places as quickly as possible, and the second is to click on the Other tab in the chat window. If there are specific people you want to avoid seeing in General Chat use the "/ignore" command to add them to your ignore list. This will block you from seeing their posts and also any group invites they send to you.
Some Useful Tips
If your character gets physically stuck, open the chat window (upper left corner) and type /stuck. This will move your character for you, usually to a spot where you are not stuck. If that doesn't work then try using your speeder if you have one. Or try transporting yourself to another location. Or get someone nearby to duel with you. Or logout and log back in.
You get experience for speaking with each crafting skill vendor at fleet. So speak with each of them before selecting your skills. Your codex will be updated with information about each crafting skill and you can use that information to make your choices. Crafting skills can be changed later.
There is a shortage of purchasable resolve modifications (high in willpower, which is best for Jedi Consulars and Sith Inquisitors).
Some of the Datacrons give you colored matrix shards instead of stat bonuses. These can be combined in special locations to create relic items which can be equipped to improve character stats.
While armor type (light, medium, or heavy) is restricted by class, when you choose a secondary class you may be able to use armor you weren't able to before. Also you can equip your companions with items you yourself cannot use. So you may want to hold on to some items that you cannot use so that you can make use of them later.
You can expand your inventory by paying 5000 credits. This will increase the inventory by one additional line of items. To get another line you will have to pay 20000 credits.
There isn't any point to holding onto planet commendations. You can spend them on their respective planets but there are also commendation vendors on the space station. Initially commendations were planet specific, but now they are interchangeable so you can go to a lower level planet and farm Heroic missions for commendations.
The purpose of a guild is to allow similarly minded people to play together and pool resources. Guilds can be started by anyone as long as 5 people agree to join. You can join only one guild at a time. The slash command to quit a guild is "/gquit".
Grouping is useful for accumulating social points and completing Heroic missions that often require 4 players. To invite someone to a group use the slash command "/invite". To leave a group right click on your portrait and select the Leave Group option. When you are in a group and a chest is opened or other item drop happens and there are items that are green or better each member of the group has a chance to claim or pass on the item. Appropriate group etiquette is this: You should only indicate "Need" when the item improves the primary stat of your character (Willpower for Consular and Inquisitor, Strength for Knight and Warrior, Cunning for Smuggler and Agent, Aim for Trooper and Bounty Hunter) and and you plan to wear it immediately. If you do not "Need" the item but it would improve the primary stat of your active companion then select "Greed". Otherwise you should pass on the item so that someone else in the group who needs it will get it.
General Thoughts on the Game
While the game areas are expansive, just as the Star Wars sets are, the game places quests in such a way that you spend an enormous amount of time running around. Perhaps this is a mechanism to keep people from staying on a planet beyond their level by driving them off with sheer boredom. I've seen people with personal speeders but I do not know how to get one.
The quests are all very similar. The basic quest format is: retrieve x number of thingamajigs from y different locations and deliver them to z other locations, killing n opponents along the way, and then return to the quest giver for reward of some experience, credits, and an item or two. The only difference as you level up is that the opponents you face are tougher or more numerous. So frankly, it gets boring. After playing two characters to level 20 and one to level 10 I'm already tiring of it. There are a large number of skills that you gain as you level up to about level 35. After that leveling up usually just increases the power of your existing skills.
The game intentionally makes it difficult to play by yourself. The game expects you to join up with friends or strangers and there are things you cannot purchase or find without doing so. I prefer not to do that and the one time I have so far I experienced several crashes and ended up abandoning that quest. While most of the Heroic areas that are expected to be done by a group can be done solo you will need to be several levels higher than the recommended level to have a chance of success. But there are still some things that require being in a group.
One of the seemingly optional things you can do is find the Datacrons, which are powerful artifacts spread around the galaxy that give you bonuses to your basic attributes. There are websites online that will show you exactly where they are, so finding them isn't that difficult. But unfortunately most of them require mastery of jumping and any misstep requires starting over from the beginning again, so expect to spend several frustrating hours getting to some of them.
-------------
If you found this article useful and you choose to begin playing SWTOR or are already playing but have not yet indicated that you were referred by someone, then you can show your appreciation by using my personal referral link. This will give both you and me in-game rewards as documented at the Friends of Star Wars site here.
Tuesday, March 6, 2012
Say Goodbye to Yahoo! Widgets

 Yahoo! has announced that they are dropping support for the Yahoo! Widget Engine (Konfabulator) and will be dropping the desktop Widget gallery effective April 12. The brief history on this is that Konfabulator is a product first developed on the Mac and then ported to Windows that allowed easy development of cross-platform HTML/Javascript based widgets that run on your desktop. Yahoo! bought the shareware product from the developer (and hired the developer) and released it for free. Over 6000 widgets were developed by the community, most of whom were just individuals wanting to contribute. This got the attention of Apple, Microsoft, and Google and they all developed their own copycat but platform-specific solutions. Yahoo! provided a gallery so that authors could upload in one place and users could download in one place. They built in functionality so that when a widget was downloaded it would automatically install and make it very easy for the users. Using the gallery meant you could keep count of downloads and have comments and ratings. It was all good. And on April 12, 2012 it will be all gone.
Time marches on, but it is a tragedy that repositories of knowledge are discarded in the wake.
Photos from Konfabulator Developer Day 2007 at Yahoo! HQ
Monday, February 20, 2012
Adventures with Star Wars The Old Republic
Last November I was invited to participate in the beta testing of Star Wars The Old Republic, a Bioware MMORPG set in the Star Wars universe. I had no experience with MMORPG's but decided that since the price was right, that is free, I could spare a weekend to test it out. On my Mac of course, despite the game only being available for the Windows platform.
Having never played a MMO-anything before I found the experience to be somewhat irritating. Other players, without so much as a by-your-leave, would rush in and kill creatures I was planning to exterminate myself. Only once did a stranger heal me. And most of the chatting seemed to have little to do with the game.
In terms of playability though I found the game to be very playable as long as I was using Boot Camp. Playing using Parallels 7 was more prone to failures. Playing in Boot Camp resulted in failures only after several hours of play. Over all, while I enjoyed the weekend play I decided against buying the game.
 After watching the re-release of Star Wars I in 3D in the theatre I reconsidered my decision and since there is no Mac version available at this time, I bought the Windows version. Since I had the beta installed I thought I would be able to get started with a simple update, but unfortunately after updating I found that the game would not go past the launch page. So I re-installed the game from the discs. Unfortunately after that I still found I could not get past the launch page. I searched about online and found that someone else was reporting the same problem, and like me had been a beta tester. So I wiped the game completely from my Boot Camp partition and downloaded in from their website. It took 3 days to get a complete download because it would fail multiple times during the download claiming that files needed to be "repaired". I started the process on a Tuesday and although I ran it continuously it didn't complete until Friday morning. A good workout for Windows XP, since I think that is the longest I have run Windows XP on my Mac without rebooting.
 Fortunately I have had no problems playing except for occasional crashes to a blue screen. This has happened only a few times in a weekend of play and recovery is generally painless because the state of your game is being saved on the server. A quick reboot and I'm back to within seconds of where I was when it crashed. My Jedi Consular is now up to level 10 and so far I am enjoying it. My understanding is that for the first 10-15 levels you play the provided storyline and then after that you have more freedom. So basically the first 10-15 levels are like an extended tutorial. You can create multiple protagonists so I will be creating a Sith as well so that I can experiment with their powers and storyline. There are 8 possible protagonists (4 light side and 4 dark side) and each has its own storyline, with some quest overlap.
The hardest part for me so far is that I do not like the interface. You have to use the WASD keys to move your character and the mouse (or key commands) to initiate actions such as attacks. I would far rather point the mouse at where I want to go, a la NWN2.
At this point a few people have tried to get the game to play in a Wineskin, so that Windows is not required, but according to doh123 Bioware changed something between the beta and official release that Wine cannot handle. So at this time the best option for Mac owners is to use Boot Camp and Windows.
-------------
If you found this article useful and you choose to begin playing SWTOR or are already playing but have not yet indicated that you were referred by someone, then you can show your appreciation by using my personal referral link. This will give both you and me in-game rewards as documented at the Friends of Star Wars site here.
Sunday, February 19, 2012
Correcting Recent Apple TV Gen 1 (ATV1) Woes
The first generation Apple TV (ATV1) is one of the products that Apple got right technically but seems to have later decided that the product didn't quite fit into their overall direction of making content cloud-based, and as a result there have been ongoing issues as they have pushed the second generation model forward. As I have now encountered two of these issues and I have no immediate plan to replace my ATV1 with an ATV2 I thought the problems and solutions to be blog-worthy.
Apple TV Not Authorized to Play Content
Sometime around October 28 users started to have problems trying to play content on the ATV1 that had been purchased and synced from another device, such as their Macintosh. Since it is common for ATV1 owners to make their purchases on iTunes and then sync the content to the ATV hard drive this was noticed by the community very quickly. People became frustrated that their recent purchases could not be played on their TV through the ATV. Fortunately the solution is simple. As documented in a November 19 post by Winston Churchill (really?) of Poulton-le-Fylde, United Kingdom and confirmed by others including myself, the solution is to purchase something else on the ATV1. Fortunately the thing you purchase can be free. One something is purchased on the ATV1 all content that you have purchased will again be playable. At the time the Ice Age short Scrat's Continental Crackup part 2 was free, so I "purchased" that using the ATV interface and afterward the ATV was able to play everything I had previously purchased.
Refusal to Sync with Apple TV following Lion 10.7.3 update
Yesterday I purchased a movie on the Apple TV and then tried to sync it back to my Macintosh and got the error "Apple TV is not responding. Check that any firewall software running on this computer has been set to allow communication on port 3689." Having recently upgraded Lion to 10.7.3 I do not know if the root cause of this problem is Lion 10.7.3 or iTunes 10.5.3.
I first verified that the Apple TV was working fine and then for good measure unplugged it and re-plugged it and it came up fine. It is connected via Ethernet, so I knew that the wireless network could not be the source of the problem. I hadn't changed any security settings on my Mac recently, but to verify that the Firewall settings were not the problem I turned off the Firewall, and that still did not resolve the problem.
Finally I was able to solve the problem from within iTunes by doing the following:
- In iTunes right-click on the Apple TV icon in the sidebar under DEVICES to display the context menu.
- In the context menu there should be an option to Transfer Purchases from "Apple TV". Select that option.
- The recently purchased content on the ATV will then be transferred to the Macintosh. And after that you will be able to sync content back to the Apple TV again.
Wednesday, February 15, 2012
Options for playing Neverwinter Nights 2 on Mac OS X
Note: This is a followup of my November 2011 blog post on installing the NWN2 expansions on Mac OS here.
Edited Jan-2-2015 to update the links to the Windows patches since the original NWN2 IGN Vault ceased operation and the patches are now hosted on Neverwinter.org. Also added a link to the Aspyr Mac final patch on mac.Softpedia.com since Aspyr no longer hosts it.
It can be challenging to play Neverwinter Nights 2 on a Macintosh. Each of the options for doing so has pros and cons.
Assuming you have a good enough graphics card to play the game it is possible to run it natively on OS X 10.5, 10.6, and 10.7. Aspyr published NWN2 for Mac which was distributed on DVD and eventually released a patch available on their support site to bring it to version 1.23.1765 which is current with the last official Windows NWN2 patch. The limitations of this are that it requires the DVD both to install AND to play, it does not include the NWN2 Toolset, it does not include the expansions (MotB and SoZ), and there is no built-in update feature for patching. The Aspyr patch may be found on the Aspyr site here or on the mac.Softpedia.com here. While it is possible to get the expansions installed you either have to rip the appropriate files from the Windows DVDs or install NWN2 for Windows and the expansions on a Windows partition or VM and then copy the required files over to Mac OS X. Either way it can be a lot of trouble and the second way requires that you have access to a copy of Windows and the Windows version of the NWN2 OC in addition to the MotB and SoZ content.
If you have Mac OS X 10.6.6 or later and have access to the Mac App Store (requires Mac OS X 10.6 or later) then you can buy the 1.23.1765 version on the App Store and download and install and play without requiring a DVD drive. Other than not requiring a DVD to install and play this has the same limitations as buying the Mac DVD version - no toolset, no expansions. In addition when you play it automatically updates the ini file with the cd keys with the cd key from the download, which is a problem if you want to use a different key. Other differences from the DVD version are that the game files, instead of being in folders in the Applications folder, are stored in the Neverwinter Nights 2.app file itself, and the game documents (saves, override folder for custom content, etc.) are stored in the ~/Library/Application Support folder rather than the Documents folder. There are also some minor bugs introduced with this version.
Those are the only two options for running the Mac version of NWN2, but it is possible to run the Windows version of NWN2 on the Mac as well using a variety of technologies. A key advantage of using the Windows version is that it is the only way to use the NWN2 Toolset. If you have access to a decent version of Windows (Windows XP or Windows 7) and a DVD drive you can install those on a Bootcamp partition on your Mac and use either Bootcamp or Parallels (I have done both) to play the game. If you purchase the disc versions (separately or NWN2 Platinum) then you will need to use the Update feature to apply the patches to get to version 1.23.1765. Once patched to 1.23.1765 the Windows version (unlike the Mac disc version) no longer requires the discs to play. Getting patched is a hassle though, even with the built-in update feature. It takes a very long time and has to download a ton of content and if the update feature isn't working is even worse.
Alternatively you can buy the Steam version and avoid the hassle of patching and discs. The disc-based and Steam versions install the game files and toolset in different locations, but they do work. This requires that you have Windows though.
You can also buy the NWN2 Complete collection on GOG which includes the fully patched Windows versions with the OC, MotB, SoZ, and MoW. These can be installed in a Wineskin (see blog post here) in order to play on a Macintosh (no Toolset compatibility in the Wineskin unfortunately).
If you do not have or want to use Windows but you do have the Windows versions of NWN2, such as the NWN2 Platinum discs or NWN2 Gold + SoZ discs or NWN2 OC, MotB, and SoZ discs, then it is possible to install from the NWN2 discs directly into a Wineskin Wrapper and run the game without Windows on Mac OS X 10.5 or later. Doing so will allow you to play NWN2 without using a Windows partition or VM, without requiring a disc, and with any legal CD keys you wish. While the program files are installed into the wrapper, the user documents (custom content, override folder, saves) are stored in the Documents/Neverwinter Nights 2 folder. Unfortunately I have been unable so far to get the NWN2 Toolset running from within a wrapper, but that may simply be a matter of time. In the meantime if you have the Windows version you can at least run the toolset in a Windows VM or partition.
Here are the instructions I have for creating a NWN2 Wineskin Wrapper and installing the Windows versions of the NWN2 OC, MotB, and SoZ and patching to 1.23.1765. I used the NWN2 Platinum dics to do this install.
NWN2 Platinum (disc) Wrapper notes
Advantages of this:
- Like the Mac App Store version does not require a disc in the drive to play.
- Like the Mac disc client version stores saved games and custom content in ~/Documents/Neverwinter Nights 2/ folder rather than inside the ~/Library/Application Support/Neverwinter Nights 2/ folder.
- Uses the keys specified rather than overwriting the NWN2 OC key which the Mac App Store client does.
- Allows MotB and SoZ to be played without requiring an installation of Windows.
- Should also be compatible with installing MoW but I haven't tried this.
Disadvantages:
- Possibly incompatible with multi-player LAN or internet play. (not tested)
- Requires the owner have the Windows version of NWN2 OC.
- Not compatible with the Toolset... yet (no Mac version is at this point).
Instructions for creating the wrapper:
Note: Rather than creating a wrapper I recommend downloading the wrapper I link to from this blog post.
Created new wrapper using Wineskin 2.5 and Engine WS8Wine1.3.37 (also tried WS8Wine1.3.34, CXG10.3.0, but those cause crashes at the main menu.)
Use winetricks to install:
directx9
dotnet20
vcrun2005
gdiplus
dxdiagn
corefonts (may not be needed)
tahoma (may not be needed, but it is the default Toolset font)
mono28 (may not be needed)
My best experiences installing NWN2 + MotB + SoZ has always been to install the NWN2 OC and then MotB and then patch, and then SoZ and patch again. So that is what I have done here. It may however not be the most efficient way to install.
Insert NWN2 disc and run Wineskin Install Windows Software setup.exe
Do not register.
Do not install XFire and do not update.
Before installing MotB download the following Windows NWN2 patches from the Neverwinter Vault Patch Catalog into the Program Files/Atari/Neverwinter Nights 2/ folder. DO NOT DECOMPRESS THEM. (if you are not an english speaker then download the equivalent pcx1 versions for your language.) (The install of MotB gets you to version 1.10.1115, so except for the modfix you only need to patch from 1101115 forward.)
nwn2_pcx1_modfix_from100788_to105912.zip
nwn2_pcx1_english_from1101115_to1101116.zip
nwn2_pcx1_english_from1101116_to1111152.zip
nwn2_pcx1_english_from1111152_to1111153.zip
nwn2_pcx1_english_from1111153_to1121295.zip
nwn2_pcx1_english_from1121295_to1131407.zip
nwn2_pcx1_english_from1131407_to1131409.zip
nwn2_pcx1_english_from1131409_to1211549.zip
nwn2_pcx1_english_from1211549_to1221586.zip
nwn2_pcx1_english_from1221586_to1221587.zip
nwn2_pcx1_english_from1221587_to1221588.zip
nwn2_pcx1_english_from1221588_to1231763.zip
nwn2_pcx1_english_from1231763_to1231765.zip
Insert MotB disc and run Wineskin Install Windows Software setup.exe
Do not register.
Update. This should get you to version 1.23.1765. You can stop here if you decide not to install SoZ because having a disc in the drive is no longer needed to play and you are fully patched for the OC and MotB. If for some reason the update stops at the end of a patch without going on to the next one just click the Close button and then click the Update button again and it should continue with the next one. If you have to you can set the Win EXE in Wineskin > Advanced to NWN2Launcher.exe so that you can start the app and continue patching.
After the patching has completed you can delete the nwn2_pcx1_… patch files from the Program Files/Atari/Neverwinter Nights 2/ folder.
Before installing SoZ do the following:
- IMPORTANT: copy the file Program Files/Atari/Neverwinter Nights 2/Data/VO_X1.zip to a safe location so it can be restored later because it is mistakenly deleted by the SoZ install. On a normal internet connected install the auto patcher would fix this with the nwn2_pcx2_englishvofix_from1201541_to1201541.zip patch, but this patch is ignored by the auto patcher when the internet is not connected.
- download the following Windows NWN2 patches from the Neverwinter Vault Patch Catalog into the Program Files/Atari/Neverwinter Nights 2/ folder. DO NOT DECOMPRESS THEM. (if you are not an english speaker then download the equivalent pcx2 versions for your language.) (The install of SoZ gets you to version 1.20.1541, so you only need to update from there.)
nwn2_pcx2_english_from1201541_to1211549.zip
nwn2_pcx2_english_from1211549_to1221586.zip
nwn2_pcx2_english_from1221586_to1221587.zip
nwn2_pcx2_english_from1221587_to1221588.zip
nwn2_pcx2_english_from1221588_to1231763.zip
nwn2_pcx2_english_from1231763_to1231765.zip
Insert SoZ disc and run Wineskin Install Windows Software setup.exe
Do not register.
Update. This should get you to version 1.23.1765. If for some reason the update stops at the end of a patch without going on to the next one just click the Close button and then click the Update button again and it should continue with the next one. If you have to you can set the Win EXE to Wineskin > Advanced to NWN2Launcher.exe so that you can start the app and continue patching.
After the patching has completed you can delete the nwn2_pcx2_… patch files from the Program Files/Atari/Neverwinter Nights 2/ folder.
Restore the VO_X1.zip file to the Program Files/Atari/Neverwinter Nights 2/ folder.
Copy the icon from either the Mac client (if you have it) or from Paul the Tall's wrapper to the new NeverwinterNights2.app or create your own.
As I said above I have not yet gotten the NWN2 Toolset to work, but that is my goal. I have been able to get it to load and display the windows (see below) but unfortunately it does not yet function.
 |
| NWN2 Toolset not quite working in a Wineskin Wrapper |
Sunday, February 12, 2012
Simple Batch Program Launcher for DOSBox
I decided that it would be easier for me to launch games within DOSBox if I had a little launch menu that appeared when starting DOSBox. So I brushed off some very old DOS BAT file programming skills, consulted a couple of websites, and came up with this simple launcher. It just displays a menu of options and then launches those programs. It is named menu.bat and is in my ~/DOSGAMES folder.
To make DOSBox automatically mount the location of my games folder and run menu.bat I edited the DOSBox preferences file in ~/Library/Preferences/ adding the following lines to the end of the autoexec section:
To make DOSBox automatically mount the location of my games folder and run menu.bat I edited the DOSBox preferences file in ~/Library/Preferences/ adding the following lines to the end of the autoexec section:
 |
| Screen displayed when launching DOSBox and using my menu.bat |
Saturday, February 11, 2012
Playing Dungeon Master on Mac
 I have fond memories of playing Dungeon Master in the late 80's on my trusty Apple IIGS. The game interface was so different than the cRPG's that preceded it like Ultima, Wizardry, and Bard's Tale. It was the first to fully utilized the mouse to grab things, throw things, cast spells, open doors, solve puzzles, eat food, drink potions, and fight beasties. And unlike those earlier games the monsters would follow you down hallways if you tried to run away, giving the combat a far more realistic and threatening feel. The dungeon levels were also immense; far larger than I anticipated. I distinctly remember around level 4 thinking that I had played for so many hours that I must be near the end of the game, but there were in fact several levels and many more hours of adventuring to go.
Dungeon Master was a huge hit for FTL/Software Heaven on several platforms: first the Atari ST,followed by the Commodore Amiga, IBM PC, Apple IIGS and others (not Mac though). It was followed by the sequels Chaos Strikes Back! and Dungeon Master 2 (which was released for Mac but not IIGS). I never purchased or played CSB, but by the time Dungeon Master 2 came out I had a Macintosh and so I bought the Mac version, there being no IIGS version. The Mac version of DM2 is a Power PC application and cannot run on Mac OS X unless you use the Classic OS 9 mode. Since Apple dropped Classic with Mac OS X 10.5 the only Mac I have that can play DM2 natively now is in a box in my garage.
When I started experimenting with Wineskin a couple of weeks ago, my intent was to use it to allow me to play the Windows versions of games since the Mac versions now no longer work because of Classic and Rosetta being dropped by Apple in OS X 10.5 and 10.7 respectively. It didn't take long to get Wineskins working with the Windows versions of DM and CSB, but I was unable to get a working Wineskin for DM2. My attempts only resulted in the Wineskin log reporting that I should try DOSBox.
So, today I downloaded DOSBox and set that up to work with Dungeon Master 2 as well as a couple of older AD&D based cRPGs: Eye of the Beholder and Eye of the Beholder 2.
This got me thinking though about all of the emulation technologies I have set up now, each with their own pros and cons.
 |
| My Apple IIGS desktop using Sweet 16 |
 |
| Dungeon Master IIGS using Sweet 16 |
 |
| Dungeon Master 2 using DOSBox |
 |
| Dungeon Master 2 Mac using Sheepshaver |
Using Wineskin Winery, which is free, to create Wineskins worked well with Windows versions of Dungeon Master and Chaos Strikes Back!, but did not work at all with Dungeon Master 2. DOSBox, also free, can run Dungeon Master 2 but not Dungeon Master or Chaos Strikes Back! (at least not the versions I have) and DOSBox requires far less disk storage than Wineskin ports do.
 |
| My Mac OS 9 desktop using Sheepshaver |
And there is also a free Java version of Dungeon Master that should work on any system that supports Java. At this time anyway that includes Mac OS X 10.7 but I suspect future versions of Mac OS X may not include Java.
Frankly I find the range of options to be a little staggering. But it is nice to know that so many people have developed free technologies that allow abandoned software like Dungeon Master to continue to be used many years after its development.
Emulation... because a program is a terrible thing to waste.
Saturday, February 4, 2012
Putting Wineskin to Work
I have several posts now about using Wineskin to convert games from Windows to Mac. I have had a range of success, with some games fully functional, some partially functional, and some not at all functional. I thought I could convert several of my older games like Warcraft and Diablo, but ran into a bit of trouble when the the Windows partition of these hybrid disks wouldn't mount on the Mac desktop. I found a solution with this help from the Codeweavers site on how to mount and unmount a Mac/Windows hybrid disk with a little help from Disk Utility to determine the device name of the CD (generally the one in Disk Utility that is grayed out) and the terminal commands:
mkdir cd (creates a directory as a mount point; any name will do, but cd is a safe and simple one to use)
mount -t cd9660 -r /dev/<device name of CD grayed out in Disk Utility> <name of directory you created> (the cd should now mount on the desktop so you can use it with Wineskin)
umount <name of directory you created> (this unmounts the cd so you can then eject it normally)
Even with this resolved I haven't yet been able to get working versions of either Warcraft or Diablo.
However, I have had some success with applying Wineskin to solving some Mac-incompatibility problems with software we use at USC.
Oracle Calendar 10.1.2
For many years we have used the calendar originally called CorporateTime and now called Oracle Calendar. There have been both Windows and Mac clients of the software, but the Mac client will not work on Mac OS X 10.7 because it is not a native Intel application. This meant that people were either not upgrading to Mac OS X 10.7, switching to using the less functional web client, or running the Windows client in Parallels. Since Oracle has no plans to upgrade the client themselves I decided that this would be a good candidate for converting with Wineskin. I had a functional beta within an hour. It took a little more time to get full functionality. Because I used the icon from the PowerPC client the final product looks just like an official client and actually works better and faster than the Mac client was on Snow Leopard.
I used the WS8Wine1.3.37 engine with the Wineskin 2.5 wrapper. In options I enabled the Map User Mac OS X folder in wrapper and the Option key works as Alt settings. The Windows client I installed was version 10.1.2. I saved the wrapper after running the app and configuring the Oracle Calendar server settings, so users who download my client can just login without having to do any setup at all. The most complicated thing to do involved installing Gecko. Gecko is required for the in-client help system, but installing it into the wrapper was an exercise in frustration. I finally got it working though.
I decided to provide a FAQ along with the application because (1) the cut/copy/paste keystrokes in the Windows client require the ctrl key while on the Mac you use the command key. So to copy something from a Mac program to the clipboard you use command-c, but to then paste it into the Oracle Calendar you use ctrl-v. And (2) Wine seems to have some issues with multiple monitors, so if you move the application to a secondary monitor it may become unresponsive to the mouse; this doesn't always happen but when it does the only solution seems to be either closing and reopening the application or moving it to the primary screen.
Amdocs ClarifyCRM 13.1
Also for many years we have used the ClarifyCRM client, for which there has never been a native Mac client, for problem ticketing. The Windows client is an old product that hasn't been upgraded in years. If newer versions are available we are not using them. I again had some success getting the application to run within an hour using the WS8Wine1.3.37 engine and Wineskin 2.5 wrapper, but then I ran into difficulties. At doh123's suggestion I turned on warnings and was able to determine that many dll's were reported to be missing. The strange thing is that the dll's were not missing as they were installed by the Clarify installer. I messed around with it for some time, but eventually resolved it in an unexpected manner. I noticed that many of the warnings referred to "nt" and I knew the application was pretty old. So I went into Wineskin > Advanced > Tools and then used the Config Utility (winecfg) to set the Windows version to Windows NT 4.0. After that the application worked correctly except for the in-client help system. I did install Gecko, but even attempting to open the help causes the application to crash.I was unable to resolve this, but figure that most users are already familiar with the client and would not require the help system anyway.
Update: I was able to get the in-client help to work by using winetricks to add corefonts and in the Wine configuration Libraries tab removing the msvcrt override.

The thing that actually took the most time was to find an image that allowed me to use Img2icns.app to create the appropriate application icon.
As I had done with Oracle Calendar I wrote a FAQ to explain how to use the copy/paste keys and to explain the outstanding issue with multiple monitors.
It was very nice to be able to spend only a few hours and have working Mac versions of these applications.
mkdir cd (creates a directory as a mount point; any name will do, but cd is a safe and simple one to use)
mount -t cd9660 -r /dev/<device name of CD grayed out in Disk Utility> <name of directory you created> (the cd should now mount on the desktop so you can use it with Wineskin)
umount <name of directory you created> (this unmounts the cd so you can then eject it normally)
Even with this resolved I haven't yet been able to get working versions of either Warcraft or Diablo.
However, I have had some success with applying Wineskin to solving some Mac-incompatibility problems with software we use at USC.
Oracle Calendar 10.1.2
For many years we have used the calendar originally called CorporateTime and now called Oracle Calendar. There have been both Windows and Mac clients of the software, but the Mac client will not work on Mac OS X 10.7 because it is not a native Intel application. This meant that people were either not upgrading to Mac OS X 10.7, switching to using the less functional web client, or running the Windows client in Parallels. Since Oracle has no plans to upgrade the client themselves I decided that this would be a good candidate for converting with Wineskin. I had a functional beta within an hour. It took a little more time to get full functionality. Because I used the icon from the PowerPC client the final product looks just like an official client and actually works better and faster than the Mac client was on Snow Leopard.
I used the WS8Wine1.3.37 engine with the Wineskin 2.5 wrapper. In options I enabled the Map User Mac OS X folder in wrapper and the Option key works as Alt settings. The Windows client I installed was version 10.1.2. I saved the wrapper after running the app and configuring the Oracle Calendar server settings, so users who download my client can just login without having to do any setup at all. The most complicated thing to do involved installing Gecko. Gecko is required for the in-client help system, but installing it into the wrapper was an exercise in frustration. I finally got it working though.
I decided to provide a FAQ along with the application because (1) the cut/copy/paste keystrokes in the Windows client require the ctrl key while on the Mac you use the command key. So to copy something from a Mac program to the clipboard you use command-c, but to then paste it into the Oracle Calendar you use ctrl-v. And (2) Wine seems to have some issues with multiple monitors, so if you move the application to a secondary monitor it may become unresponsive to the mouse; this doesn't always happen but when it does the only solution seems to be either closing and reopening the application or moving it to the primary screen.
Amdocs ClarifyCRM 13.1
Also for many years we have used the ClarifyCRM client, for which there has never been a native Mac client, for problem ticketing. The Windows client is an old product that hasn't been upgraded in years. If newer versions are available we are not using them. I again had some success getting the application to run within an hour using the WS8Wine1.3.37 engine and Wineskin 2.5 wrapper, but then I ran into difficulties. At doh123's suggestion I turned on warnings and was able to determine that many dll's were reported to be missing. The strange thing is that the dll's were not missing as they were installed by the Clarify installer. I messed around with it for some time, but eventually resolved it in an unexpected manner. I noticed that many of the warnings referred to "nt" and I knew the application was pretty old. So I went into Wineskin > Advanced > Tools and then used the Config Utility (winecfg) to set the Windows version to Windows NT 4.0. After that the application worked correctly except for the in-client help system. I did install Gecko, but even attempting to open the help causes the application to crash.
Update: I was able to get the in-client help to work by using winetricks to add corefonts and in the Wine configuration Libraries tab removing the msvcrt override.

The thing that actually took the most time was to find an image that allowed me to use Img2icns.app to create the appropriate application icon.
As I had done with Oracle Calendar I wrote a FAQ to explain how to use the copy/paste keys and to explain the outstanding issue with multiple monitors.
It was very nice to be able to spend only a few hours and have working Mac versions of these applications.
Tuesday, January 31, 2012
Even More Adventures Converting Windows RPG Games to Mac OS X
In my blog post More Adventures Converting Windows RPG Games to Mac OS X I described the steps I went through to get Baldur's Gate, Baldur's Gate II, Icewind Dale, and Icewind Dale II to work using Wineskin by doh 123. Wineskin allows you to create a mini-Windows environment wrapped in a Mac OS X compatible .app. Windows software can be installed and run from this mini-Windows environment. The technology is effective but isn't perfect, in part because Windows isn't really installed. And the creation of an application Wineskin can be more art than science. While my games worked because I installed from discs I still needed the discs to play. I could have hunted on the web for cracks but I prefer not to do that. Instead I bought the Dungeons and Dragons Anthology Master Collection from GamersGate.com which for only $20 includes all of the four games I had already converted as well as Temple of Elemental Evil and Planescape: Torment, neither of which I owned. This post will explain what I did to get all 6 of these games working in Wineskins. For BG, BG2, IWD, and IWD2 I used freely available Wineskins to start with. For ToEE and PS:T I was unable to find free Wineskins so I created my own from scratch using the free program Wineskin Winery which is available at the Wineskin site.
First a note about purchasing games from GamersGate. While both Mac and Windows games are available at GamersGate, if you buy Windows games then when you download it assumes you are using Windows and requires you run an exe to control the download. Fortunately I have Windows XP installed in a Parallels virtual machine and so I was able to run the exe from there. The download was roughly 9 GB (give or take) and so it took a while. In the end I had a DnD_Anthology folder with 12 cab files and a single .msi installer.
Baldur's Gate + Tales of the Sword Coast expansion
Paul the Tall's site has a Baldur's Gate the Original Saga Wineskin wrapper that I downloaded to start with. This wineskin uses the Crossover Games 10 engine, which works well for many older games. To install BG into the wrapper I did the following:
The only problem I have had so far is that quitting the game sometimes causes the application to lock up. In that case just cmd-q to exit the Baldur's Gate.app. I have not tested playing multi-player on a LAN.
Baldur's Gate II + Throne of Bhaal expansion
I used Paul the Talls's Baldur's Gate 2 Complete Wineskin wrapper to begin with. For the most part the steps are identical to the ones for installing BG.
First a note about purchasing games from GamersGate. While both Mac and Windows games are available at GamersGate, if you buy Windows games then when you download it assumes you are using Windows and requires you run an exe to control the download. Fortunately I have Windows XP installed in a Parallels virtual machine and so I was able to run the exe from there. The download was roughly 9 GB (give or take) and so it took a while. In the end I had a DnD_Anthology folder with 12 cab files and a single .msi installer.
Baldur's Gate + Tales of the Sword Coast expansion
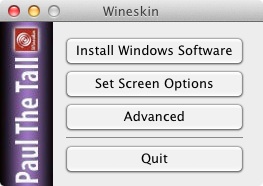 |
| Wineskin.app initial menu |
- Right click on Baldur's Gate.app and "Show Package Contents"
- Double-click Wineskin.app to launch it.
- Click the Install Windows Software button.
- Navigate to the DnD_Anthology folder and select the Classic.msi installer.
- The installer begins and allows the selection of which of the 6 applications to install. I selected Baldur's Gate and deselected the others and the install began.
- When the install completes you are prompted by Wineskin to choose the exe that should execute when Baldur's Gate.app is launched. I chose Baldur.exe. (This setting can be changed at anytime by going to Advanced > Configuration in Wineskin.app.)
- To allow multi-player games to be initiated (a benefit in BG because it allows you to create more than just one party member) I went to the Advanced > Tools screen in Wineskin.app and selected the utility Winetricks.
- Click on Winetricks to launch the Winetricks utility. This utility is often used to install missing missing dll's and other Windows resources that are required by the application.
- On the Winetricks dialog check the Custom checkbox halfway down the dialog box and type directplay in the box to the right of "winetricks" and then click the Run button.
- Winetricks will then download and install directplay. When it completes you can click on the Close button to return to the Wineskin > Advanced dialog. Then click the Done button to return to the Wineskin.app initial menu.
- There can be a white screen delay when launching the game. To prevent this go into Wineskin.app's Set Screen Options and selecting Override and Full Screen and then click Done.
- On the Wineskin.app initial menu click Quit.
 |
| Advanced > Tools dialog |
 |
| Wineskin.app winetricks dialog |
That's it. Afterwards launching Baldur's Gate.app will start Baldur's Gate. You can copy save game files and character files from any other BG installation you have by just copying them into the appropriate folders in the Baldur's Gate.app application. If you want to try installing mods then you should use the Install Windows Software option in Wineskin.app. I strongly recommend making a backup of your Baldur's Gate.app before playing around with it though or you may find yourself having to install it all over again.
The only problem I have had so far is that quitting the game sometimes causes the application to lock up. In that case just cmd-q to exit the Baldur's Gate.app. I have not tested playing multi-player on a LAN.
Baldur's Gate II + Throne of Bhaal expansion
I used Paul the Talls's Baldur's Gate 2 Complete Wineskin wrapper to begin with. For the most part the steps are identical to the ones for installing BG.
- Right click on Baldur's Gate 2.app and "Show Package Contents"
- Double-click Wineskin.app to launch it.
- Click the Install Windows Software button.
- Navigate to the DnD_Anthology folder and select the Classic.msi installer.
- Select BG2 and deselect the other applications.
- When the install completes choose balder.exe when prompted by Wineskin.app.
- Use winetricks to install directplay. (steps 7-10 above)
- Use Set Screen Options and select Override and Full Screen to prevent the white screen delay when launching the game.
- On the Wineskin.app initial menu click Quit.
For some reason every time I launched the game it would say that it was the first time and force me into the BGConfig program. So to get around this I changed the Windows EXE specified in Wineskin.app > Advanced > Configuration from /Program Files/Atari/DnDMC/Baldur's Gate II/baldur.exe to /Program Files/Atari/DnDMC/Baldur's Gate II/BGMain.exe
Quitting and/or logging out of a game can cause it to lock up the application. If that happens just cmd-q to exit Baldur's Gate 2.app. I have not tested playing multi-player on a LAN.
Icewind Dale + Heart of Winter expansion + Trials of the Luremaster
I used Paul the Tall's Icewind Dale Complete Wineskin wrapper to begin with. The steps are similar to those for Baldur's Gate II above.
- Right click on Icewind Dale.app and "Show Package Contents"
- Double-click Wineskin.app to launch it.
- Click the Install Windows Software button.
- Navigate to the DnD_Anthology folder and select the Classic.msi installer.
- Select Icewind Dale and Trials of the Luremaster and deselect the other applications.
- When the install completes choose Config.exe when prompted by Wineskin.app.
- Use winetricks to install directplay.
- Use Set Screen Options and select Override and Full Screen to prevent the white screen delay when launching the game.
- On the Wineskin.app initial menu click Quit.
- Launch Icewind Dale.app and set the configuration as you wish.
- Right click on Icewind Dale.app and "Show Package Contents"
- Double-click Wineskin.app to launch it.
- Click the Advanced button.
- In the Windows EXE box change the program to IDMain.exe and click Done.
- On the Wineskin.app initial menu click Quit.
 |
| Wineskin.app Advanced dialog |
Quitting a game can cause it to lock up the application. If that happens just cmd-q to exit Icewind Dale.app. I have not tested playing multi-player on a LAN.
Icewind Dale II
I used Paul the Tall's Icewind Dale 2 Wineskin wrapper to begin with. The steps are essentially the same as the steps for Icewind Dale.
- Right click on Icewind Dale 2.app and "Show Package Contents"
- Double-click Wineskin.app to launch it.
- Click the Install Windows Software button.
- Navigate to the DnD_Anthology folder and select the Classic.msi installer.
- Select Icewind Dale 2 and deselect the other applications.
- When the install completes choose Config.exe when prompted by Wineskin.app.
- Use winetricks to install directplay.
- Use Set Screen Options and select Override and Full Screen to prevent the white screen delay when launching the game.
- On the Wineskin.app initial menu click Quit.
- Launch Icewind Dale 2.app and set the configuration as you wish.
- Right click on Icewind Dale 2.app and "Show Package Contents"
- Double-click Wineskin.app to launch it.
- Click the Advanced button.
- In the Windows EXE box change the program to IWD2.exe and click Done.
Quitting a game can cause it to lock up the application. If that happens just cmd-q to exit Icewind Dale 2.app. I have not tested playing multi-player on a LAN.
I have noticed some cursor flickering which can be annoying. I'm not sure how to resolve that.
Temple of Elemental Evil
For ToEE I could not find an existing free Wineskin wrapper to use, so I created my own. To do so I used the following free tools:
- Wineskin Winery 1.3 to create the Wineskin wrapper
- Img2icns to create an icon for the finished application
Within Wineskin Winery you specify an Engine and wrapper version to use and then create a new blank wrapper. Engines and wrappers are downloaded for you within the utility. Once you start Wineskin Winery, to get the latest Wrapper version just click on the Update button. Following that click on the + button to download an Engine. For ToEE I used the WS8WineCX10.1.0 Engine. I tried a few others first and they did not display the opening screens correctly.
When you create a new wrapper you will be prompted to allow X11 to communicate with your system, to which you should click Accept. You will also get a dialog asking you if you want to install Gecko. Gecko isn't needed for most games, so do not install it. When prompted to name your wrapper you should use the name you want the .app to be. In this case I chose Temple of Elemental Evil.
Once you have your Wineskin wrapper created you can quit Wineskin Winery.
Once you have your wrapper the steps are very few. Use Wineskin.app's Installed Windows Software to install ToEE from the Classic.msi installer; for the Windows EXE select ToEE.exe. You do not have to change the Screen Options or install directplay for ToEE.
To create the icon for the application I just Googled for a good image and then dragged it onto the Img2icns window and saved the results as icns. You can then browse in Finder to that created icon file and do Get Info on it. In the Get Info dialog click on the icon in the upper left and type command-c to copy it. Then do Get Info on your Temple of Elemental Evil.app and click on the Wineskin icon in the upper left corner and type command-v to replace that icon with the one you created. That's it.
Those familiar with ToEE know that there is a modding group called the Circle of 8 who released corrections and enhancements to ToEE. While installing those was tempting I could not find a way to do so from within Wineskin.app because they rely on .Net. It might be doable by installing the missing components with winetricks and then using Install Windows Software to install the mods, but I did not figure out the necessary steps to get the custom content installed.
Planescape: Torment
I saved the best for last. Getting PS:T working was in fact a torment. Here is the process I followed, based in part on the installation instructions at this blog.
First I used Wineskin Winery to create a blank wrapper using Wineskin 2.5 and Engine WS8WineCX10.1.0 and named it PlanescapeTorment.app
Second I used the Wineskin.app Install Windows Software option to install PS:T from the Classic.msi installer, and then setting the Windows EXE to Torment.exe
Then in Wineskin.app Screen Options I turned on Override and selected Fullscreen.
Then I used Img2icns.app to create a nice icon from the icon here and pasted it onto the PlanescapeTorment.app icon in the Get Info dialog.
At this point I tested the game and it worked, but the resolution was so low that everything was huge. So I continued on installing the two mods suggested on the blog to address that. Before you do I strongly recommend you make a copy of your PlanescapeTorment.app. It is possible that any further mods will result in messing up your .app file and you would then have to start over.
I downloaded and installed The Bigg's Widescreen mod:
Dungeon Master and Chaos Strikes Back
 |
| Wineskin Winery utility by doh123 |
Once you have your Wineskin wrapper created you can quit Wineskin Winery.
Once you have your wrapper the steps are very few. Use Wineskin.app's Installed Windows Software to install ToEE from the Classic.msi installer; for the Windows EXE select ToEE.exe. You do not have to change the Screen Options or install directplay for ToEE.
To create the icon for the application I just Googled for a good image and then dragged it onto the Img2icns window and saved the results as icns. You can then browse in Finder to that created icon file and do Get Info on it. In the Get Info dialog click on the icon in the upper left and type command-c to copy it. Then do Get Info on your Temple of Elemental Evil.app and click on the Wineskin icon in the upper left corner and type command-v to replace that icon with the one you created. That's it.
Those familiar with ToEE know that there is a modding group called the Circle of 8 who released corrections and enhancements to ToEE. While installing those was tempting I could not find a way to do so from within Wineskin.app because they rely on .Net. It might be doable by installing the missing components with winetricks and then using Install Windows Software to install the mods, but I did not figure out the necessary steps to get the custom content installed.
Planescape: Torment
I saved the best for last. Getting PS:T working was in fact a torment. Here is the process I followed, based in part on the installation instructions at this blog.
First I used Wineskin Winery to create a blank wrapper using Wineskin 2.5 and Engine WS8WineCX10.1.0 and named it PlanescapeTorment.app
Second I used the Wineskin.app Install Windows Software option to install PS:T from the Classic.msi installer, and then setting the Windows EXE to Torment.exe
Then in Wineskin.app Screen Options I turned on Override and selected Fullscreen.
Then I used Img2icns.app to create a nice icon from the icon here and pasted it onto the PlanescapeTorment.app icon in the Get Info dialog.
At this point I tested the game and it worked, but the resolution was so low that everything was huge. So I continued on installing the two mods suggested on the blog to address that. Before you do I strongly recommend you make a copy of your PlanescapeTorment.app. It is possible that any further mods will result in messing up your .app file and you would then have to start over.
I downloaded and installed The Bigg's Widescreen mod:
- Downloaded widescreen-v3.05.exe from <http://forums.gibberlings3.net/index.php?s=ab759621f20e6e33366f362095575c1e&app=downloads&showfile=896>
- Use Wineskin.app Install Windows Software to run widescreen-v3.05.exe. When it prompts for a directory type in the path to the Planescape Torment folder (for me it was C:\Program Files\Atari\DnDMC\Planescape Torment)
- After a while of spinning press command Q to quit the never ending Wineskin is currently busy dialog.
- Use Wineskin.app Install Windows Software to run setup-widescreen.exe and it should open up a text window and give instructions so you can install the component, choose your screen size (X 1024, Y 768 worked for me), and update your save files. Once it starts updating it will run for a few minutes and then say that it was successful and press enter to exit.
- Wineskin will tell you to select a new executable and if for some reason it does not allow Torment.exe then just accept it and then go into the Advanced configuration and change the Windows EXE back to Torment.exe
- Downloaded Ghostdog's UI mod from <http://www.shsforums.net/files/file/683-ghostdogs-pst-ui-mod-v22/>
- To decompress it you'll need an app that can decompress 7zip files. I use Keka.
- Decompress Ghostdogs_PST_UI_mod_v2.2 and copy the contents to the same directory that Torment.exe is in.
- Use Wineskin.app Install Windows Software to run Setup-GhostDog's-PST-UI.exe
- Install the component and pick the percentage and language you want (use the image at <http://www.thunderpeel2001.com/webpics/font-sizes.jpg> to determine what size is most readable)
- Click OK when Wineskin asks you to select the executable
Following this I started up PS:T and everything was working. At this point I suggest you either stop or you make a backup of your PlanescapeTorment.app file because all further attempts I made to install custom content failed and broke the game. I tried to install the Ultimate PST Fixpack, Unfinished Business, and the Qwinn's Tweak Packs. Those mods are supposed to be installed in that order. However I found that after installing the Ultimate PST Fixpack any attempt to start the game would just crash. So my advice is to just stop after installing the widescreen and Ghostdog UI mods.
Dungeon Master and Chaos Strikes Back
I whipped out functional wrappers for Dungeon Master and Chaos Strikes Back in no time at all, but suffered a set back when trying to create a wrapper for Dungeon Master II. Since those games do not have installers I just created new blank wrappers and then dragged their game folders into the Program Files folder in the wrapper and set the Windows EXE appropriately.
I think that Wineskin opens up a whole new world of gaming for Mac users, as well as helping us play games like Baldur's Gate whose Mac client will not work on OS X 10.7 or later.
I think that Wineskin opens up a whole new world of gaming for Mac users, as well as helping us play games like Baldur's Gate whose Mac client will not work on OS X 10.7 or later.
Sunday, January 29, 2012
Making Over the Neverwinter Nights 2 Official Campaign
As a hobbyist most of my computer programming efforts over the years have been focused on singular tasks designed to solve specific problems. Every once in a while I have attempted large efforts, but most of those failed to come to fruition for various reasons, although I do not consider the hours spent on them wasted. The only constant through the years is that I do not charge for my work. I have no problem with those who charge shareware fees, it is just that I started doing this when the only term for software was "software" and I see no reason for attaching other terms to my efforts. Most of the tools I have used have also been freely distributed and I do not spend a significant amount on books or equipment so I have no need to recoup costs.
 |
| Apple's At Ease launcher for Mac OS 7 |
 |
| No Worries, my 1994 IIGS launcher inspired by "At Ease" |
 |
| Apple's "Copland" icons didn't materialize as planned |

| GSCopland icons I created for the IIGS inspired by magazine pictures of the Mac System 7 "Copland" desktop, which was then scrapped by Apple in 1996. I distributed mine via GEnie on July 12, 1995. Mine are yellow because I felt it looked better and more cheerful than periwinkle blue. Apple later incorporated the slanted Copland look in Mac OS 8 and 9 and it was then adopted in a reversed form by Microsoft for Windows XP. See Know Your Icons for more on the history of computer icons. |
When I started modding for games like Baldur's Gate and Icewind Dale II I also tended to develop things that I thought were missing in the games and would add enjoyment for players. BG1, for example, lacked the ammunition containers that some other Infinity Engine games had, so I developed a set of containers using resources from those games and made them available in BG1 Tutu via WeiDU - a free installer modding utility for Infinity Engine games. My containers were later adopted (without my knowledge) into a collection of fixes for BG and so were likely widely distributed. I developed similar containers and many other items for IWD2 as well. All of these are available on my downloads page.
When I began modding for NWN2 I first envisioned creating a large campaign to rival the Official Campaign. That campaign is the Gem of Power campaign, which I am still developing several years later. In the meantime though I developed the Harvest of Chaos: King's Festival + Queen's Harvest campaign based on the D&D campaign of the same name by Carl Sargent. The King's Festival chapter of my campaign was first released in May 2009 and I incorporated several of the features of the NWN2 Storm of Zehir (SoZ) expansion. Most importantly the death system, the party creation system, and the crafting system. It took a signifiant amount of effort to determine how those systems worked and to address weaknesses and bugs so that I could incorporate them into King's Festival. Shortly afterward there was a post on the now-defunct Bioware boards in which someone suggested that it would be great if the NWN2 OC could use the same death system and party creation system as SoZ. I replied without thinking too hard about it that I thought it would be possible since I had already developed the necessary scripts for King's Festival. From that moment on I was committed to making my statement a reality. And I was determined to make it happen quickly. The result was that in October 2009 I released the NWN2 OC Makeover SoZ Edition. The Vault web page discusses the many features of the Makeover so it will suffice to simply say here that playing the OC with the Makeover installed is a completely different experience than playing without. As a result the OC Makeover to my surprise became one of the more popular mods for NWN2. With the game's subsequent release on Steam and other online sites hopefully the number of Makeover users will increase further.
 |
| This graphic by PJ156 uploaded to the NWN2 Bioware Social boards shows the download counts in October for NWN2 mods in the Vault (note: not all mods are represented). |
Since releasing the Makeovers I have continued to enhance the crafting system I incorporated into them that is based on the SoZ Crafting system. My version - SoZ Crafting Plus - addresses many of the bugs in the SoZ system and enhances in further by allowing recipes to be easily created without having to modify or merge 2DA files.
Links to all of my NWN2 mods are on this blog page.
Subscribe to:
Posts (Atom)